C U R R I C U L U M M A T E R I A L S
|
Malcolm Moore
Overview
Main Ideas
All buildings are more than functional.
Each tells us something about the time and
the people who built and occupied it and
those who have used it and occupied it
through the years. Looking into the histories
of buildings makes the study of history
more immediate and personal. These two
lessons, The History is in the Building and
If Buildings Could Talk, allow students to
explore the histories of public and private
buildings through use of local research
facilities, documents, photographs, and
oral history.
Connection with the Curriculum
The best use of these materials would
be in a U.S. history class where the teacher
teaches a local history unit or a unit on the
methods of studying history. Buildings provide insights into local history. There is a
natural connection here to language arts
or writing classes.
Teaching Level
Grades 7-12
Objectives for Each Student
Explore ways to conduct local
historical research
Access and use local
historical resources
Conduct oral history interviews
Present results of historical
research in a variety of ways
Draw conclusions based on
historical research
THE HISTORY IS
IN THE BUILDING
Materials for Each Student or Group
Photographs and locations
of buildings to be studied
List of local resources that
can be used by students
Handout containing description of
assignment, criteria for successful
completion of assignment, and list
of due dates for assigned project
Activity 1Researching Buildings
with Primary Sources
SUGGESTIONS FOR
TEACHING THE LESSON
|
Preparing to Teach the Lesson
As this information will be different with
each location in which the lesson is taught,
some prior preparation will be necessary
by the teacher. Take your camera and go
to some of the older buildings in town.
Take pictures of the facades and any
cornerstones, tablets, or inscriptions that
might appear. Check out the public library's
local history department, the local historical
society, and the county clerk's office, etc.
You will need to know the hours of each,
the extent of the collections, and the persons who can help you and your students.
An alternate preparation could have the
students take the pictures as part of a field
experience and make the calls to local
sources based on the discussion that
occurs in Opening the Lesson.
Opening the Lesson
Open the lesson with a questioning
strategy:
What is the oldest building in town?
What makes you think so?
What is it used for?
Was this its original purpose?
How could we find out?
Where would you go for
this information?
Developing the Lesson
Assign a building to each student or
group of students. Tell them they are to use
the resources developed in Preparing to
Teach the Lesson to tell about the original
purpose of the building, what it originally
looked like, what it looks like today, and its
current use. Depending on the time, age,
and ability of your students and the availability of the information, you may choose
to have them trace several changes in the
building's history.
Concluding the Lesson
After research is concluded, students
or student groups should prepare a
poster showing their findings and give
an oral presentation to the class.
As a culminating activity, a timeline
showing the history of the community
can be developed as each poster is
presented and each presentation is
made.
31
A large group debriefing should occur
that draws together what the students
learned about doing research using
local sources, what they learned about
their city, and what misconceptions
were uncovered and corrected by
this activity.
Extending the Lesson
Take the culminating activity a step
further and add to the timeline in
a different color important events in
American history that were happening
at the time these building were
making local history.
Ask the local library or historical
society to display the posters.
Assign students to write the history
of the building they researched.
In the last century, and even into this one, it
was not unusual for the newspaper to run a
lengthy article describing in detail and showing photographs of an important new public
building or business. Provide one of these
to students and have them compare it to the
current building. Results could be presented
in a Venn diagram. A Venn diagram is used
for comparing and contrasting two items. It
consists of two intersecting circles. The outside part of each circle shows one item's
unique characteristics. The overlapping part
of the circles show details of how the two
items are alike.
Assessing the Lesson
Assessment should be based on the
posters and presentations given, it will be
much easier if you have given the directions
and criteria in writing and you develop a
checklist based on these. Intermittently
during the project have student/groups write
an update of what they have accomplished,
what they have left to do, and what help
they need from you.
IF BUILDINGS COULD TALK
Materials for Each Student or Group
Handout containing possible list of
buildings and persons to interview
Handout containing description of
assignment, criteria for successful
completion of assignment, and list
of due dates for assigned project
Handout containing oral history selections) for students to read as samples
Activity 2Researching Buildings
with Oral History
Preparing to Teach the Lesson
Prior to assigning this project, it will be
necessary to compile a list of possible
local buildings that students may use.
Churches, post offices, courthouses,
libraries, schools, and stores, are all
possibilities. The buildings need to be
old enough and need to have at least
one person who has a significant history with the building who can tell about
it over a period of years. In the case of
a church, an older member, an older
member who is second generation to
the church, or a church historian would
be ideal to interview. In the case of a
public building or a local store, someone associated with it for a long time,
such as a custodian, might know more
about the building than someone who
worked there. But any person who has
a long history of regularly using a public
building (i.e., a lawyer for a courthouse
or a longtime patron of a store) will be
able to provide the necessary information for the student.
A set of guidelines with appropriate due
dates needs to be set for the project.
Opening the Lesson
Ask students to name a building whose
use has changed in the last year or so.
Examples might include a video store
that moved in when the local mom and
pop grocery store closed, a gas station
that has been remodeled into a bakery
thrift shop, etc. Students will understand that some buildings' uses
change on a regular basis.
Ask students to name buildings that
have been in their current location
and serving the same purpose for a
long time. Remember, students'
perspective of a long time may be
different from the teacher's.
32
Tell them that this lesson will deal
with collecting information about these
buildings using oral history.
Developing the Lesson
If the students have not done oral histories before, take the time to explain
to them that oral history tells how the
information is collected, not how it is
reported. It would be good to provide
an oral history selection or two for the
students to read. The writings of Studs
Terkel are good for introducing oral
history. For the technique of conducting interviews, review suggested reading in the Bibliography at the end of
this volume under the heading "Oral
History Examples and Techniques."
You may want to conduct an oral history interview with someone connected with the students' school as a modeling exercise for the class. Be sure to
include the interviewed person's biographical and background information.
The information in the oral history is
much more valuable if we know who
the interviewed person is and understand how the person is connected
with the building.
Provide each student with a handout
listing the possible buildings to investigate. Discuss them and ask students
to help you add to the list. It would be
helpful to have photographs of the
buildings because students often
recognize a building but do not know
its name.
Distribute and discuss the handout
listing the requirements and timeline
you have set for completing the project.
Concluding the Lesson
Students' oral histories should be presented to each other in small groups
of three to five where each student
can read each other group member's
oral history. Each group should discuss what their oral histories have in
common and what they learned about
the community and its buildings by
doing the project. Each group should
present its findings to the large group
as a debriefing exercise, including
suggestions as to how to improve the
project for the next group of students.
Extending the Lesson
Bind the histories and present them to
the school library, public library, and/or
local historical society.
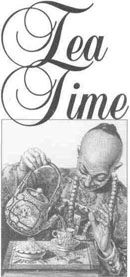
Host a tea/reception to thank all the
persons who were interviewed with
this project. This gives students the
chance to ask follow-up questions and
get leads for more projects, or they
can just stand back and listen as the
guests share more information with
each other.
Allow students to repeat this activity
with a different building.
Students can interview another "old
timer" associated with the building that
was the subject of their just completed
project and compare the two oral histories.
Conducting oral history interviews with
a parent, a grandparent, and each
other, have students compare
changes in housing over the last fifty
years. Things to look for would be
numbers of rooms, numbers of bathrooms, numbers and uses of outbuildings, terminology changes (family
room, living room, great room, etc.),
ways houses were heated and cooled,
and the number of people living in
houses compared to the number of
rooms in the houses. If a significant
number of students collect this information, a large data base could be
constructed and generalizations made.
Assessing the Lesson
Read the students' oral histories,
assessing them based on whether
they followed the written guidelines
provided by the teacher and met the
deadlines in a timely manner.
Assess the overall project by listening
to the groups' presentations in the
large group debriefing.
33

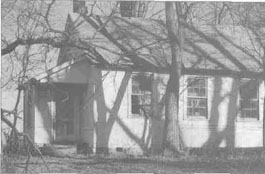
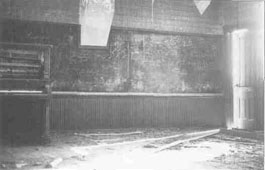
- Photograph of the buildinginterior and exterior
- What changes in the building can you see?
- What was the building originally used for?
- Is it still used for that purpose?
- What other purposes has it served?
- Where will you research the building?
- What do you hope to find in your research?
34

PUBLIC BUILDINGS
(Schools, theaters, stores, offices, courthouses, etc.)
- Who is your interviewee, and what is his/her relationship with the building?
- What is the building's present use?
- Is it still used for that purpose?
- How has the building changed as its use changed?
- How has appearance changed, both exterior and interior?
- What people used this building during its history?
Remember people who used it on a regular basis, not just celebrities.
- How did people use this building?
RESIDENTIAL BUILDINGS
- Who is your interviewee, and what is his/her relationship with the building?
- When was this building built?
- Who built it?
- How many people lived in it? How has this changed over the years?
- How has the building changed on the exterior? On the interior?
- What do you remember about the colors used in this building? Furniture? Wallpaper?
Floor coverings? Lighting? Heating/cooling source?
- Do you have any old photos of this building and its inhabitants?
Do not forget family albums. What do they tell us about the building and its family?
Click Here to return to the Article
35
|